

How To Repair Vinyl Leather Chair
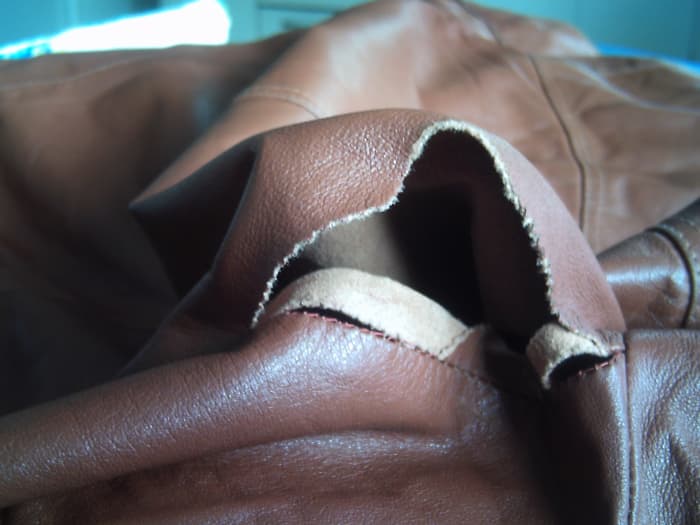
A large tear in loose leather is very hard to sew and can be just as tricky to resew as leather that is too tight.
Leather Furniture Repair: A Comprehensive Guide
If you have leather chairs or leather furniture, you know that it is made to last forever unless something happens. But what if that leather tears or rips, or a seam splits? Is it time to buy something new, or is there something you can do to repair your leather?
Most people don't realize just how easy it is to restore and refinish leather furniture. Or that leather tears and rips and leather furniture seam splits are all really common issues, but they are not often addressed. Many people believe that they just need to live with the damaged furniture. This is not the case! There are lots of options for you to do on your own right in your own home, to restore that leather furniture to its former glory.
Leather seam repairs and leather tear repairs are at the top of my list for things you can fix on your own. But of course, there are always exceptions, and that's when you should hire a seasoned leather repair professional to handle the task at hand. There are many out there. You just need to do a quick internet search, and you'll always be able to find exactly what you need!
Once you have noticed that seam splitting open on your sofa or that ripped leather cushion on the back of the chaise lounger, it is time to take action! Get that leather tear repaired before it is twice as big as it started!
Seam splits are especially easy to underestimate. They can rip right open before you even realized that the threads were slipping farther and farther along that seam. Leather stitch repair is the answer you may not have known you were even looking for!
Skill Assessment
Types of Leather Tears
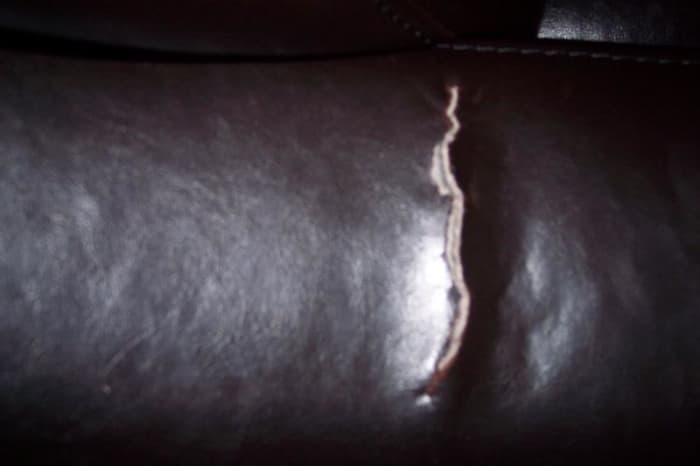
Leather rip on a chair cushion
What Are the Different Kinds of Leather Rips and Tears?
While you examine the damaged area in your leather, whether it's torn or ripped, there are a few things you should look for to determine if sewing the leather repair is a good option. Usually it is, but there are a few things to watch for that cannot be stitched.
Types of Leather Tears NOT to Restitch
- Large tears that are over an inch in diameter
- Extremely jagged rips or tears
- Rips or tears that have an arrow shape or point, with rips on either side
- Tears that create a wide flap
- Tears in dry, rotted leather
- Rips in very thin leather
- Rips in extremely tight leather
I know that these seem like a lot of kinds of leather rips and tears to not attempt to fix, but it is with good reason! The goal of this article is to save you time and money, and to salvage your leather furniture and goods . . . not to make the damage even worse or possibly spread further!
There are good reasons why you should not attempt to stitch these kinds of damage.
- Large and wide tears are very hard to restitch because they will create a really big and thick scar, as well as puckering on each end of the tear where the leather is forcibly pulled together.
- Most very jagged rips are hard to sew because without an even edge to bring together, there can be waves and puckers in the leather as well as gaps between stitches.
- Arrow-shaped and pointed rips that have two separate tears, down either side, from a central point, are very hard to sew back together because they are two structurally weak spots in the leather that can tear away easily or pull against the other half during the restitching process. If you resew one half of this type of tear, it is a gamble whether the other half will pull together or if you will end up ripping out the stitching you just completed!
- Never try to restitch leather that appears to be very thin, is dry rotting, or seems flaky and crumbly. These kinds of leather are often old, damaged, and very fragile, and once you push the needle through, this new hole further weakens the leather. Each stitch is a risk and can actually tear through, making a wider area of damage.
Know When to Seek Professional Assistance
Trying to fix leather tears like these is very frustrating and often a waste of time, money, and resources. Knowing that when you do a leather stitch repair, be aware that every stitch you make will make a puncture in the leather, marring the surface from being smooth as well as perforating each side of an already stressed and damaged area.
If each stitch is in the right spot on regular and sturdy leather, the seam will hold, and the tear will be only a thin crease, but if the tear is any of these risky repairs, just remember that future repair attempts will have to cover a larger, messier weakened area and ultimately, it is less likely to have a good leather repair result.
Don't be too stressed, though, because these kinds of leather rips and leather tears can be fixed, but you will probably need professional help. Leather tear repairs on a larger scale can have great results that are smooth and beautiful and may not even look like there was ever any damage at all with the leather repair techniques that are now available! But I wouldn't suggest doing them at home on your own!
Helpful Tips
- Remember, keep all stitches neat and tight, about 0.5 cm width per stitch.
- Stitch about 0.5 cm from the edge of the tear.
- Using pliers to grab the needle and pull it back through can help stitch faster.
- Thimbles save fingertips from accidental puncture.
- Only use 1mm or thicker thread (normal weight thread will break!).
Read More From Dengarden
Leather Tear and Stitch Repair: Stuff You Should Know
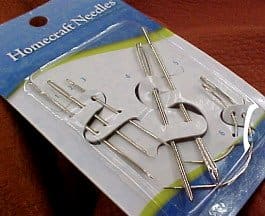
Leather needles—look for needles saying LEATHER specifically!
How to Fix Leather Tears
Once you have gotten to look at the leather tear carefully to make sure that it is a task you want to undertake, it is time to get down to business.
With all of the materials needed at hand, it is pretty much a straightforward process.
How to Repair a Leather Tear
- Take your leather sewing needle—I prefer the curved ones, especially when the tear is in the center of furniture or a cushion and you cannot get the underside of the leather (except through the hole in the tear)—and thread it using a length of thread that is double the length that the tear is long. The thread will be 2 pieces thick.
- Put it through the eye of the needle and pull it down until it is totally even with itself, and this double-thick thread is what needs to be about twice the length of the tear.
- Knot the end of the thread to itself; double-knotting is good because you don't want any chance of this coming undone.
The process is slightly different if it is for a leather seam split, especially if there is still remaining original thread. The original threads need to be knotted off to prevent further unraveling, and then tied to your new repair thread.
How to Repair a Leather Seam Split
- I like to start my first stitch one stitch back from the last loose thread. Start from the bottom so the knot stays on the underside of the rip.
- Pull the thread all the way up, and make the next stitch across from this point.
- Push the needle in on the right side, and with the thread coming out of the wrong side of the leather, pull the seam in tightly and knot the new thread to the old tightly. This knot is on the bottom too and is now invisible, you can snip off any extra length of the original thread from the sofa so that it doesn't work its way back up to be visible.
- Now bring the needle back up to the right side of the leather (on the same side of the split as you are still on) and then make your next stitch across from the split going in the right side and out of the wrong side so the thread always comes up and is coming out of the right side.
Seam splits are actually a bit easier to sew because they have the holes already made for you in the leather! So pushing the needle through is so much easier than having to make new holes, like you would in a leather tear repair.
When you have finished restitching the seam, it is best to stitch a couple of stitches farther down past the end of the broken thread, reknotting the original thread to the new thread and then knotting the new thread on the underside of the leather so it can't be seen.
How to Stitch the Leather
- Start your stitch at one end of the tear, about 0.5 cm in from the raw and torn edge, pushing the needle through from the underside so the thread is coming out of the top, or the right side, of the leather.
- Pull the thread so it is all the way up and all even—no loose thread or unevenness in the remaining thread—and that you can see only the knot at the bottom, with no extra slack of thread visible. Now you will make your first stitch across from the first but on the other side of the tear, starting on the top, or the right side, directly across from the first stitch.
- Push the needle into the right side of the leather and push it back out on the SAME SIDE about half of a centimeter (0.5 cm) away from where the needle went in. This will keep the thread coming out of the RIGHT side of the leather, and it should always be coming out of the right side before you move on to your next stitch, across the tear, directly across from the last stitch.
Leather is really thick, and it is pretty hard to push that needle through the leather, so be aware that it will take some effort. Be sure to have your thimbles on, at least on your index fingers, and I like to keep the small pliers handy to help pull the needle through once you have reached the other side.
Keep your stitches small and tight, always about 0.5cm wide per stitch, and make sure that each stitch is exactly across from the last. After every stitch, take a moment to make sure the thread is pulled taught and even so that there is no slack or bubbles of thread pooling at one stitch or another. Keeping every stitch pulled tight will ensure that the end result is a tight and even seam with minimal gaps.
How to Knot Off
After you have stitched your way down the entire length of the tear, it is time to knot off and hide the knot! After the final stitches are complete and you're sure that the seam is nice and tight with no loose threads or random thread sticking out, it is time to knot it off. Here's how:
- Push the needle down so it is going in the right side and comes up in the middle of the seam (through the split and not making a new hole in the leather). You can knot the thread like you would for any other sewing project and to itself, as long as the knot is as low and deep in the crack as possible!
- Now push the needle back down into the crack and up through a stitch made on the other side, across from where you started. Go down and up like a normal stitch but bring the needle up farther down in the crack, as far as you can get it.
- Pull the thread very, very tight, and snip it off as close to the leather as possible. The taught thread from where you knotted it off should pull the end of the thread back into the crease, and you now have an invisible knot!
The repair is complete!
Leather Tear Repair
A large leather rip can be sewn together to restore and preserve the life of the leather furniture! Large and unsightly tears can be made to disappear with a few swift stitches.
You can restore your leather, but never fear—even if you think the job is too big, there are leather stitch professionals that can quickly and easily make those tears and rips a thing of the past!
Robyn Sarabia on August 07, 2015:
I have really good leather sofas I'm trying to sale but when we moved through the front door the armrest got caught right on the seam of the stitching like perfectly. Is this a cheap and easy fix or should I hire someone it's only a couple of years old and I paid $50000 and I do not know how to sew?
How To Repair Vinyl Leather Chair
Source: https://dengarden.com/interior-design/Leather-Seam-Repairs-Made-Easy
Posted by: mouserresichey.blogspot.com
0 Response to "How To Repair Vinyl Leather Chair"
Post a Comment